Landscaping Mississauga Gardens – how to read fertilizer labels and choose the right fertilizer for your soil

fertilizers

If you decide to improve the quality of your soil using a chemical fertilizer,which is a quick fix method to improve the quality of your soil, you face a sometimes daunting task of selecting the appropriate fertilizer for your soil conditions among the variety of fertilizers available.  Choosing carelessly just any fertilizer, based on its name for example, may lead to further deterioration of your soil.

When using a fertilizer, you need to keep in mind the type of soil you originally have which you should determine by a taking a soil test described in one of our previous blog entries.

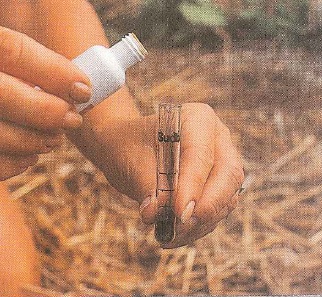
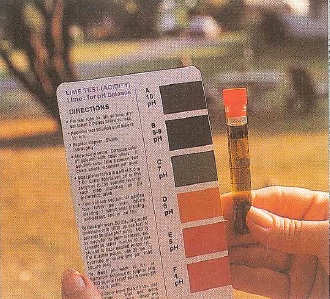
1. the soil tests done by using a soil kit to test for the pH and key nutrients levels described in detail here, determines what is the pH scale of your soil.  The pH scale describe the degree of acidity and alkalinity: an extremely high  (alkaline) or low (acid) pH levels affect the ability of plant to absorb essential mineral nutrients from the soil.  The majority of plants in southern Ontario flourish in soils with a pH ranging between 6 and 7, which is mildly acid to neutral.  To raise the pH level of acid soil, add ground limestone from a local garden centre, or wood ashes from a fireplace after the spring cleaning; to lower the pH of alkaline soil, use powdered sulfur, acid peat moss, or an acid fertilizer or simply mulch your garden with with acid ladden pine needles or oak leaves, which will lower the pH level as they decompose.

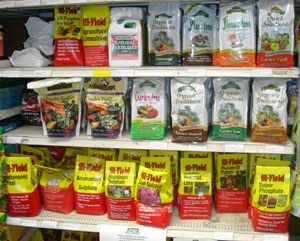
2. there are three major ingredients your soil needs in order for plants to flourish: nitrogen (for leaf and steam growth), phosphorus (for root development, seed formation and flowering), and potassium that enhances the plants vigour and resistance to diseases.  On the bag of fertilizer, the ratio of these nutrients is always expressed in this order: nitrogen (N), phosphorus (P) and potassium (K); that means that 10-10-10 fertilizer has ten percent of each nutrient mixed with filler, while 5-10-5 fertilizer is higher in phosphorus.

Landscaping Mississauga Gardens – composting

If the soil tests described in our last two blog entries show that you need to improve the soil, you can do so in two ways; by adding the missing chemical components or composting.

The best way to build a better soil is to work in lots of organic matter that can solve all sorts of soil problems, such as poor drainage, lack of earthworms, extreme pH levels, or low nutrients.  The best source of organic matter is compost pile, which allows you to recycle leaves, grass clippings, plant debris, and household food waste into a nutrient rich soil conditioner.  Follow the steps below to learn how to make a compost pile:

composting1

1.Build a compost pile from alternating lawyers of “wet” material (green plant matter, fruit and vegetable peels, coffee grounds) and dry plant debris.


composting2

2. Sprinkle wet lawyers with wood ashes (for potassium and to lower pH) or lime (to raise pH) and livestock manure, or blood meal (a slaughterhouse by-product), or garden soil.


composting3

3. Spray the compost pile with water until it is moist as a squeezed out sponge; later moisten the pile whenever it gets dried out.


composting4

4. Turn the compost once a week, moving material from the outer edges of the pile into the center; the compost is ready to use once it is dark brown and crumby.


Repeat every year. Adding compost to your soil every year will keep it in good shape for growing plants.

Landscaping Mississauga – knowing the soil type

Plants grow in a variety of soils from Yukon tundra to Wasaga beaches; most individual plants, however, do well only in particular types of soil.  Thus, a crucial first step in designing a low maintenance garden is to evaluate your soil and the kinds of plants that grow best in it.

Sand and clay represent two extreme soil conditions. Clay soil consists of tiny particles packed together so tightly that water has difficulty seeping through.  Dense and heavy clay tends to block the spread of roots and may ultimately suffocate them; yet, the clay soil is usually loaded with nutrients because they have little opportunity to wash away.

Sandy soil contains large, loose-fitting particles that constantly shift. It has many air pocket for water to drain through and ample room for roots to spread.

Although you can find plants suitable for clay or sandy soil, you can greatly expand your selection by improving the soil with organic matter.  Your goal should be to create soil that drains within an hour after heavy rain, crumbles fairly easily in your hand, and is full of nutrients.  You can also buy a soil-testing kit from your local garden centre or hardware store and test your soil for acidity (pH scale) and key nutrients, such as nitrogen (for leaf and stem growth), phosphorus ( for root development and seeds formation) and potassium (that enhances plants vigor and resistance to diseases.  The majority of plants in the Greater Toronto Area will flourish in soils with pH ranging between 6 and 7, which is mildly acid to neutral.

Follow the steps below to test your soil:

soil type testing step 1.Step 1:

To get a representative sample of soil, mix trowefuls of soil from different parts of the garden together and put a small amount of soil in the kit’s test tube.


soil type 2Step 2:

Add the required amount of indicator fluid to the collected soil; gently shake the tube, and wait for the content to settle.


soil type 3Step 3:

Compare the tube to the test kit’s colour chart.  The more expensive your kit is the more accurate information on your soil conditions will you be able to derive.


soil type 4Step 4:

If your soil’s pH is too low, add lime to raise the level; on the other hand, to lower teh pH level, work powdered sulfur or wood ashes into the soil.  See the next week’s blog entry for details how to improve the soil condition.