Landscaping Mississauga Gardens – Best trees for dry conditions: Honey locust, Turkish hazel & Russian olive
- honey-locust is a drought resistant shade tree
Honey locust
A great choice if you want a hassle-free, attractive, fast-growing (18”+ annually) ornamental tree that won’t shade out your lawn and landscaping as it has small leaflets that produce a filtered shade.
This native to central North America, deciduous tree requires very little maintenance once planted and established. In fact, it performs best if not fertilized or watered, since optimal growth conditions in the summer and rapid growth may increases susceptibility to winter dieback of some of the new branches.
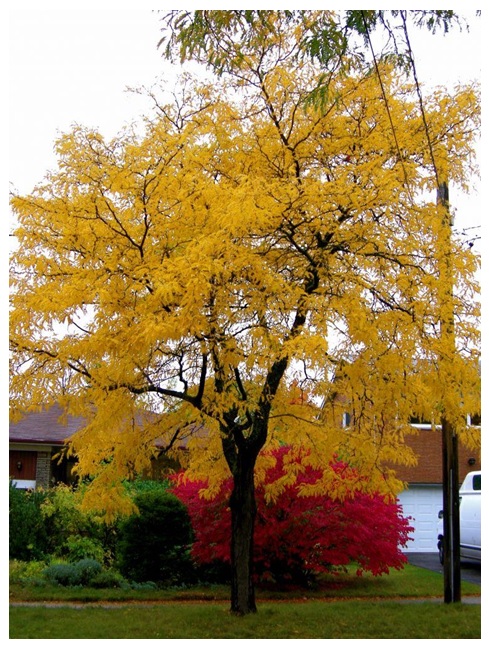
Honey locust can reach a height of 20–30 m (66–100 ft). Its leaves are bright green in spring and turn yellow in the fall. The leaves are small and in the fall they simply disappear into the lawn and decompose, without any need for raking. The strongly scented cream-colored flowers appear in clusters by late spring. The name of this tree derives from the sweet taste of its fruit, flat legume pulp that matures in early autumn. The pulp is used for food by Native American people, and it can also be fermented to make beer. The long pods, which eventually dry and ripen to brown or maroon, make a striking visual statement against the winter snow.
This ornamental tree is your best choice in dry areas, where few other trees can survive and prosper and it also tolerates urban conditions, compacted soil, road salt, alkaline soil, heat and drought. The fast growth rate and tolerance of poor site conditions make it valued in areas where shade is wanted quickly.
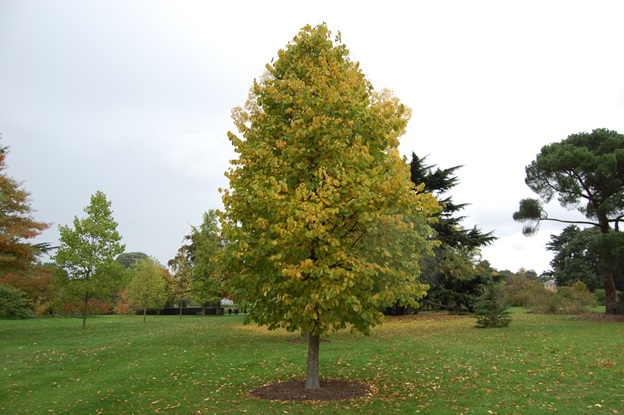
Fast growing drought-tolerant shady tree
Turkish hazel
Another excellent small tree choice for drier sites. It is drought-tolerant, but it also does well in wet conditions. This a tree for all challenging landscaping condition. It grows up to 40’ tall and has a broad, distinctive and refined pyramidal shape with interesting corky bark, and dark green foliage throughout the season. The crinkled round leaves turn yellow in October. The foliage is dense and the tree provides a nice shade in summer right from the beginning.

Russian olive can be grown as a small tree or a shrub
Russian olive
Russian olive, commonly called silver berry, oleaster or Persian olive is a native to the western and central Asia, an area stretching from southern Russia and Kazakhstan to Turkey and Iran, which is becoming very popular in Ontario as introduced species.
Russian olive can be grown either as a large thorny shrub if you trim it regularly or it can grow to the size of a small tree up to 5 metres in height. This drought-resistant ornamental plant is a very attractive addition to any garden with its dense covering of silvery to rusty leaves and highly scented flowers that appear in early spring and are followed by clusters of small cherry-like orange-red fruit covered in silvery scales. The fruits are edible, and in Iran, the dried power of Russian olive fruits mixed with milk is used to treat rheumatoid arthritis and joint pains.
Russian olive needs to be planted with caution. Because it thrives in very poor soil conditions, has low seeding mortality and matures in a few years it often outcompetes the other plants and can become invasive.
Please see our previous entries for landscaping in dry soil conditions and the best evergreens to plant in these conditions.