Posts

What is plant hardiness zone

A hardness zone is a geographically defined area in which climatic conditions’ a specific category of plant life is capable of growing, including its ability to survive the minimum temperatures of winter.

The Canadian hardiness map prepared in 2000 by Natural Resources and Agriculture Canada is divided into nine major hardiness zones: the harshest is 0 and the mildest is 8. Relatively few plants are suited to zone 0.  In addition to zones, also subzones (e.g., 4a or 4b, 5a or 5b) are noted in the map legend. These subzones are very important to  gardeners, as they pinpoint to their garden location.

The hardiness zones differ even within the greater Toronto area. For instance, Mississauga and Oakville fall into zone 6b, Brampton 6a and Etobicoke 7a. That means that in most part of Mississauga only plants that survive in the lowest temperatures -20.6 to -17.8 C, should be planted, while this threshold is lower in some parts of Toronto, including Etobicoke, where this range is -17.8 to -15.0 C, and in Brampton where the range is lower between -23.3 and -20.6 C.

Landscaping Mississauga Gardens – Sumac

Staghorn sumac will bring an interesting display of colours in the late summer and fall

Staghorn sumac will bring an interesting display of colours in the late summer and fall

Large shrubs for dry soil – sumac

Depending upon whom you ask, sumac (sometimes spelled, “sumach”) is considered either a small tree or a tall shrub. Regardless in what category the plant is put, it certainly outperforms the largest trees with its fall colourful foliage. Dense stands of sumac trees covering a slope next to some Ontario highways in a sea of red, are some of the best fall foliage spectacles we witness each year. Despite their beauty sumacs recently became less popular. This is due to the confusion resulting from the fact that apart from the delightful and harmless sumacs, there also exists in the wild a poisonous version of the species that can cause a severe skin irritation when touched. Poison sumac, however, is in a distinct minority amongst the sumacs. The remaining sumac trees and shrubs produce no poison, but provide spectacular autumn color.

Additionally, it is easy to distinguish poison sumacs from their non-poison sumac relatives in the fall, when the berries have ripened to maturity. The poisonous plants have white berries in the fall, and the berries hang down. Non-poison sumacs bear red berries and their berries grow upright. In addition, poison sumac plants grow almost exclusively in swamps, whereas non-poison sumac plants prefer precisely the opposite habitat — soils that are well-drained and many are drought- tolerant. To avoid any confusion it is best to buy sumacs from nurseries.

One of the most popular sumacs in the GTA area is staghorn sumac, a tough plant that can be grown in dry areas of the garden. It is a relatively tall, tree-like variety that can reach up to 25 feet in height. Staghorn derives its name from the hairy texture of its branches, reminiscent of the velvety feel of deer antlers. The smooth sumac tree (Rhus glabra) is another common variety; it attains a height of about 10 feet. Both provide striking fall foliage.

As mentioned at the outset, the fall foliage they provide is unsurpassed. Nor is their autumn color display limited to their leaves, for the tuft atop the plant that holds sumac’s berries is red and fluffy, increasing the plant’s visual appeal. An added bonus is the fact that this seed-tuft remains on the sumac trees all winter, attracting colorful wild birds, whose presence greatly enhances the color and variety of winter scenery. Increasingly, homeowners begin to understand the importance of achieving four seasons of visual interest on the landscape and sumac is perfect for that as adequate winter scenery is perhaps the most difficult to achieve, since vegetation is more robust in the other three seasons.

Sumac in winter

Sumac in winter

Sumac seeds are an important source of bird food, precisely because they do stay on the plant long enough to be part of your winter scenery. This makes them an excellent emergency food for birds throughout the winter and beyond. I have witnessed bluebirds, black-capped chickadees and robins feeding on sumac seeds throughout the whole winter and into early spring today.

Landscaping Mississauga Gardens – Best trees for dry conditions: Honey locust, Turkish hazel & Russian olive

honey locust
honey-locust is a drought resistant shade tree

Honey locust

A great choice if you want a hassle-free, attractive, fast-growing (18”+ annually) ornamental tree that won’t shade out your lawn and landscaping as it has small leaflets that produce a filtered shade.

This native to central North America, deciduous tree requires very little maintenance once planted and established. In fact, it performs best if not fertilized or watered, since optimal growth conditions in the summer and rapid growth may increases susceptibility to winter dieback of some of the new branches.

Honey locust can reach a height of 20–30 m (66–100 ft). Its leaves are bright green in spring and turn yellow in the fall. The leaves are small and in the fall they simply disappear into the lawn and decompose, without any need for raking. The strongly scented cream-colored flowers appear in clusters by late spring. The name of this tree derives from the sweet taste of its fruit, flat legume pulp that matures in early autumn. The pulp is used for food by Native American people, and it can also be fermented to make beer. The long pods, which eventually dry and ripen to brown or maroon, make a striking visual statement against the winter snow.

This ornamental tree is your best choice in dry areas, where few other trees can survive and prosper and it also tolerates urban conditions, compacted soil, road salt, alkaline soil, heat and drought. The fast growth rate and tolerance of poor site conditions make it valued in areas where shade is wanted quickly.


Fast growing drought-tolerant shady tree

Fast growing drought-tolerant shady tree

Turkish hazel


Another excellent small tree choice for drier sites.  It is drought-tolerant, but it also does well in wet conditions. This a tree for all challenging landscaping condition. It grows up to 40’ tall and has a broad, distinctive and refined pyramidal shape with interesting corky bark, and dark green foliage throughout the season. The crinkled round leaves turn yellow in October.  The foliage is dense and the tree provides a nice shade in summer right from the beginning.


Russian olive can be grown as a small tree or a shrub

Russian olive can be grown as a small tree or a shrub

Russian olive

Russian olive, commonly called silver berry, oleaster or Persian olive is a native to the western and central Asia, an area stretching from southern Russia and Kazakhstan to Turkey and Iran, which is becoming very popular in Ontario as introduced species.

Russian olive can be grown either as a large thorny shrub if you trim it regularly or it can grow to the size of a small tree up to 5 metres in height. This drought-resistant ornamental plant is a very attractive addition to any garden with its dense covering of silvery to rusty leaves and highly scented flowers that appear in early spring and are followed by clusters of small cherry-like orange-red fruit covered in silvery scales. The fruits are edible, and in Iran, the dried power of Russian olive fruits mixed with milk is used to treat rheumatoid arthritis and joint pains.

Russian olive needs to be planted with caution. Because it thrives in very poor soil conditions, has low seeding mortality and matures in a few years it often outcompetes the other plants and can become invasive.

Please see our previous entries for landscaping in dry soil conditions and the best evergreens to plant in these conditions.

Landscaping Mississauga gardens – best evergreens for dry soil

The best performing shrubs in dry soil in Peel, Halton, and GTA in general, are junipers and yuccas.

junipers perform well in dry soil

junipers perform well in dry soil


Junipers – grow naturally in many dry environments, such as rock outcrops and even sand dunes. There is also a large variety of species to choose from ranging from upright junipers ideal for privacy fences to creeping varieties. They come in different colours from golden green to blue.  The hardiest varieties to look for this season include the following: ground hugging Calgary Carpet or Blue Coast, and upright medium height Limeglow or New Blue Tamarix, and Blue Chip that can be used for the flower garden background or property dividing green fence when trimmed regularly.


yuccas, such as Andrew's needle tolerate dry soil and look striking in the dry garden

yuccas, such as Andrew’s needle tolerate dry soil and look striking in the dry garden

Yuccas do not require watering once they are established.  They grow a long taproot and are able to find all the water they need on their own.  In search of water, they  also spread, and if they find hospitable conditions, they may even become invasive, so regular weeding and root dividing may be necessary. Yuccas look like desert plants with spiky, pointed leaves. In July, they also display tall 150 cm – 175 cm (5’ – 6’) flowers pictured here.  The beauty of yuccas, such as Andrew’s Needle above, lies also in the fact that they are very easy to share with your neighbours – all you need to to is to chop put a part of your shrub’s roots and give it to your neighbour to plant in their garden…..

Landscaping Mississauga Gardens – how to read fertilizer labels and choose the right fertilizer for your soil

fertilizers

If you decide to improve the quality of your soil using a chemical fertilizer,which is a quick fix method to improve the quality of your soil, you face a sometimes daunting task of selecting the appropriate fertilizer for your soil conditions among the variety of fertilizers available.  Choosing carelessly just any fertilizer, based on its name for example, may lead to further deterioration of your soil.

When using a fertilizer, you need to keep in mind the type of soil you originally have which you should determine by a taking a soil test described in one of our previous blog entries.

1. the soil tests done by using a soil kit to test for the pH and key nutrients levels described in detail here, determines what is the pH scale of your soil.  The pH scale describe the degree of acidity and alkalinity: an extremely high  (alkaline) or low (acid) pH levels affect the ability of plant to absorb essential mineral nutrients from the soil.  The majority of plants in southern Ontario flourish in soils with a pH ranging between 6 and 7, which is mildly acid to neutral.  To raise the pH level of acid soil, add ground limestone from a local garden centre, or wood ashes from a fireplace after the spring cleaning; to lower the pH of alkaline soil, use powdered sulfur, acid peat moss, or an acid fertilizer or simply mulch your garden with with acid ladden pine needles or oak leaves, which will lower the pH level as they decompose.

2. there are three major ingredients your soil needs in order for plants to flourish: nitrogen (for leaf and steam growth), phosphorus (for root development, seed formation and flowering), and potassium that enhances the plants vigour and resistance to diseases.  On the bag of fertilizer, the ratio of these nutrients is always expressed in this order: nitrogen (N), phosphorus (P) and potassium (K); that means that 10-10-10 fertilizer has ten percent of each nutrient mixed with filler, while 5-10-5 fertilizer is higher in phosphorus.

Landscaping Mississauga gardens -moisture

draught tolerantThe moisture content of the soil on your property greatly affects the design of your low-maintenance garden.  Before planting examine whether your proposed garden site, as it naturally exists, is wet or dry.  Once you have determined that, you can either amend the soil or choose plants that flourish in the sort of soil you have in the garden.

The most recent trend in landscape design is  xeriscaping -choosing plants that will survive on only the natural water that is available to them. These plants should be grouped together in a dry sunny area of your garden.

However, even if your gardening area is usually dry and you decide to grow drought tolerant plants, you still may want to ensure continued good drainage in the proposed garden site before you start planting. Good drainage will prevent unusually heavy downpours or extended spells of wet weather from creating lingering puddles that could drown your plants. You can improve drainage by building raised beds on top of existing soil, by installing underground drainage pipes or tiles, or by regrading the area to create a slope that will allow water to drain away.

If your proposed garden area is generally moist, you still need to be prepared to keep it watered in dry weather. You need a water source nearby, so that during a drought you can sprinkle the spot daily in the afternoons or keep moist with the soaker hose.

Check our next blog entries for ideas what plants will do well in specific soil conditions in Mississauga and generally GTA area.  Here is our next blog entry on shrubs that perform well  in dry soil.

Landscaping Mississauga Gardens – composting

If the soil tests described in our last two blog entries show that you need to improve the soil, you can do so in two ways; by adding the missing chemical components or composting.

The best way to build a better soil is to work in lots of organic matter that can solve all sorts of soil problems, such as poor drainage, lack of earthworms, extreme pH levels, or low nutrients.  The best source of organic matter is compost pile, which allows you to recycle leaves, grass clippings, plant debris, and household food waste into a nutrient rich soil conditioner.  Follow the steps below to learn how to make a compost pile:

composting1

1.Build a compost pile from alternating lawyers of “wet” material (green plant matter, fruit and vegetable peels, coffee grounds) and dry plant debris.


composting2

2. Sprinkle wet lawyers with wood ashes (for potassium and to lower pH) or lime (to raise pH) and livestock manure, or blood meal (a slaughterhouse by-product), or garden soil.


composting3

3. Spray the compost pile with water until it is moist as a squeezed out sponge; later moisten the pile whenever it gets dried out.


composting4

4. Turn the compost once a week, moving material from the outer edges of the pile into the center; the compost is ready to use once it is dark brown and crumby.


Repeat every year. Adding compost to your soil every year will keep it in good shape for growing plants.

Landscaping Mississauga – knowing the soil type

Plants grow in a variety of soils from Yukon tundra to Wasaga beaches; most individual plants, however, do well only in particular types of soil.  Thus, a crucial first step in designing a low maintenance garden is to evaluate your soil and the kinds of plants that grow best in it.

Sand and clay represent two extreme soil conditions. Clay soil consists of tiny particles packed together so tightly that water has difficulty seeping through.  Dense and heavy clay tends to block the spread of roots and may ultimately suffocate them; yet, the clay soil is usually loaded with nutrients because they have little opportunity to wash away.

Sandy soil contains large, loose-fitting particles that constantly shift. It has many air pocket for water to drain through and ample room for roots to spread.

Although you can find plants suitable for clay or sandy soil, you can greatly expand your selection by improving the soil with organic matter.  Your goal should be to create soil that drains within an hour after heavy rain, crumbles fairly easily in your hand, and is full of nutrients.  You can also buy a soil-testing kit from your local garden centre or hardware store and test your soil for acidity (pH scale) and key nutrients, such as nitrogen (for leaf and stem growth), phosphorus ( for root development and seeds formation) and potassium (that enhances plants vigor and resistance to diseases.  The majority of plants in the Greater Toronto Area will flourish in soils with pH ranging between 6 and 7, which is mildly acid to neutral.

Follow the steps below to test your soil:

soil type testing step 1.Step 1:

To get a representative sample of soil, mix trowefuls of soil from different parts of the garden together and put a small amount of soil in the kit’s test tube.


soil type 2Step 2:

Add the required amount of indicator fluid to the collected soil; gently shake the tube, and wait for the content to settle.


soil type 3Step 3:

Compare the tube to the test kit’s colour chart.  The more expensive your kit is the more accurate information on your soil conditions will you be able to derive.


soil type 4Step 4:

If your soil’s pH is too low, add lime to raise the level; on the other hand, to lower teh pH level, work powdered sulfur or wood ashes into the soil.  See the next week’s blog entry for details how to improve the soil condition.

Landscaping Mississauga Gardens – lawn care tips

lawnWhen the snow melts, your first impulse may be to get working on your lawn – but hold on your horses ………. starting too soon may actually do more harm than good.  If your lawn feels spongy underfoot, that means that it is still too early.  Wait until the ground feels firm.   That’s the time to start working on your lawn.

The secret to a grassy yard all year-around are the following easy 8 easy steps:

1. Clean up the yard  Remove all fallen stems, branches and leaves by gently raking your lawn and gathering all the debris.  If there is more than 1cm (1/2 in.) of brown, matted blades of grass located where the soil meets the roots of your lawn, you will need to dethatch using a fan rake (if you have a large space, you may want to rent a motorized dethacher from RONA or Home Depot).

2. Curb local critters  Check the yard for any evidence of tunneling moles: little raised hills and underground tunnels in your lawn.  Fix the damage by tamping down tunnels and applying blood meal (you can find it in any garden centre). True to its name blood meal is a dry, inert powder actually made from animal blood as a slaughterhouse by-product.  It is one of the highest non-synthetic sources of nitrogen used as a composting activator as well as it can be spread on gardens to deter animals.  Used on your lawn it should discourage repeat visits from moles. Once the weather warms up, getting rid of the grubs moles feed on will also control future tunneling.

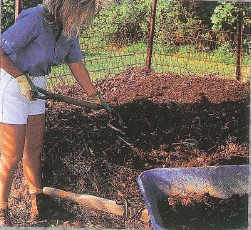
3. Aerate  Buy or rent a manual or power aerator (tip: share the cost with your  neighbours!) to remove little plugs of compacted soil from your lawn, so that air, water and nutrients can flow to the root zone, improving your lawn’s look and overall health. Aeration is especially essential in high-traffic areas, such as common paths and in areas with clay-based soil (which is most of Mississauga).

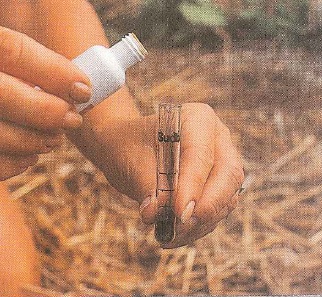
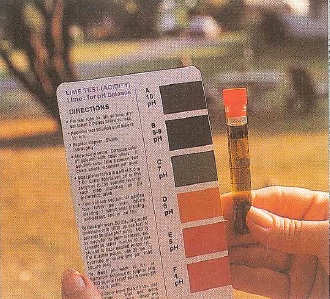
4. Top dress and reseed  This step will make your lawn thick and lush – and, as a result, naturally weed resistant.  “Top dressing” means spreading an even layer of of soil across your lawn, filling holes and leveling out uneven spots. Don’t cover the blades on your grass entirely in the process though! Then spread a good quality grass seed across your lawn (read the labels on the package carefully to make sure that the grass seed you apply is properly suited to the amount of light in your yard – sun or shade).  Rake it gently (there is no need to cover it again with more soil), and water very well.  Grass seed need soil that is warmer than 15 deg. C to germinate or you will be just wasting seed or money.  A great and simple way to check the soil’s temperature is to stick a kitchen meat thermometer in the ground and measure the temperature…. 🙂

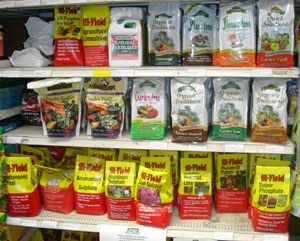
5. Fertilize  Apply lawn fertilizer that’s high in nitrogen (the first number on the bag) early in the season. Choose a “slow release” formula so your lawn gets a consistent feeding of nutrients over time, while limiting the release of of fertilizer into the water with rain and preventing fertilizer’s burns on  your lawn.  My favourite is Scott’s Turf Builder Pro.

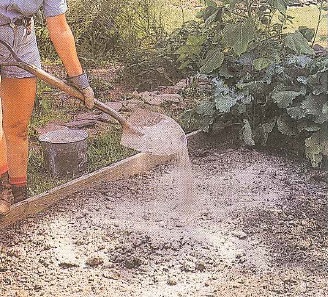
6. Water wisely  Lawns love water. The average lawn needs at least 30 to 40 mm (11/2 to 2 in.) of water per week.  If mother nature isn’t providing enough in the form of a rain, you will h ave to supplement it with a hose and a sprinkler.  Water regularly during the early morning hours when it’s cooler.  To figure out how long you need to water your lawn do a simple experiment the first time you are watering: set out a wide, empty container, such as margarine tub) in the centre of your lawn and check the time before you start watering; when the water in the container reaches 30 to 40 mm, you can turn off your water. Check the time again – now you know how long you need to water your lawn…. 🙂

7. Deal with the weeds  To get rid of weeds, you can apply an environmentally friendly herbicide like Scotts Eco Sense Weed B Gon, or remove them by hand.  If you choose the latter, I recommend doing so after a rain – weeding is a breeze when the ground is wet. Take care to ensure you’ve removed the plant and its entire taproot, And get to them before they go to seed , or you will only have more dandelions to pull in the weeks ahead.  Note that crabgrass control products prevent germination, so if you’ve used it on your lawn, you must wait up to 8 weeks before reseeding.

8. Cut the lawn with care  Mow your lawn to a height of 5 or 6 cm (2.5 – 3 in.)  This ensures the blades are just tall enough to shade out and prevent weeds from germinating, and also to keep roots pf your lawn cool. Plan on mowing once a week, alternating the direction each time. so if you run the mower up and down perpendicular to your house this weekend, you should run it back and forth parallel with your house next time.

If you have any questions or need help, just get in touch.  We are here to help

Soil preparation for gardening & landscaping in Mississauga & GTA area

soil preparationAs the weather teases us one day into believing that spring is already here; and the other day reminding us that the winter still rules, the green thumbs amongst us are eager to do something for their gardens.  Perhaps the best thing one can do while going through the ups and downs of undecided weather is to devote the time to the preparation of the soil for planting at a later time.  This is an important task as the success or failure of a garden largely depends on the soil where the plants live and grow.

There are basically three kinds of soil:  sandy, clayey and loamy.  Loam is a combination of clay and enough sand to offset the cohesive properties of the clay. It also contains considerable amount of decomposed organic matter or humus, which provides fertility, moisture retention, and hospitable environment for friendly bacteria and other organisms.  In our part of Ontario, and especially in Mississauga, the soil is mostly clayey – formed by extremely fine and compacted soil particles.  This type of soil impedes drainage, becoming a hard, solid crusted mass when dry and turning swampy when wet.  It  does not hold much air to support growth, just like sandy soils contain too  much air and not enough water to sustain growth.

We should strive to prepare garden beds that are composed of a felicitous combination of sand, clay, and humus – soil that is able to breathe, drain, and still retain enough moisture to feed the plants without drowning them.  Good soil holds the minerals and chemicals delivered by water, does not pack or clod when wet and warms up in the spring.  It should contain at least 18 inches of workable loam.   The more humus mulches, and compost are added over time, the softer and richer the soil becomes. And now, when the weather is nice,  is the perfect time to work on preparing the soil, mixing it properly.  Experts opine that one should start preparing the soil anywhere between 2-4 months before planting.   At Landpol Landscaping, we routinely add topsoil with all flowerbeds that we create, but you can start improving the quality of soil in your garden now….. 🙂